
“Don’t judge a book by its cover.” When the cover looks like this, I can’t help it.
This Red Caboose GP9 was bought by a customer as part of an estate sale. The engine was advertised this as “needs work but runs well,” and I can’t say it was falsely advertised. The customer wanted a battery power Blunami installation, and a repaint.


The first step was to inspect the locomotive. I was surprised to see how much damage was done to it cosmetically. I couldn’t tell if this was water or humidity related damage, but the decals and paint weren’t sealed. The good news was that the engine had the upgraded P&D drive. After a quick cleaning and lubrication, it did run well.

The first step in any repaint project is to media blast the engine. I use blasting soda, which is soft enough for plastic and brass. Since the customer models the Buffalo, NY area, I figured this was a funny representation of engine in a snow storm. The customer agreed.


After media blasting the shell, I was also pleased to see the upgrade kit included brass handrails and grabirons.


The next step was to remove all the detail parts for priming and painting. The hood was the most complex part of the paintjob, and the customer supplied reference images for the artwork. We had discussed using decals for the scheme. However, we determined that painting would be easier than placing the decals, especially given the detail on the side of the hood. I am finding that paint is usually the most cost-effective approach over decals for more detailed models such as this one.


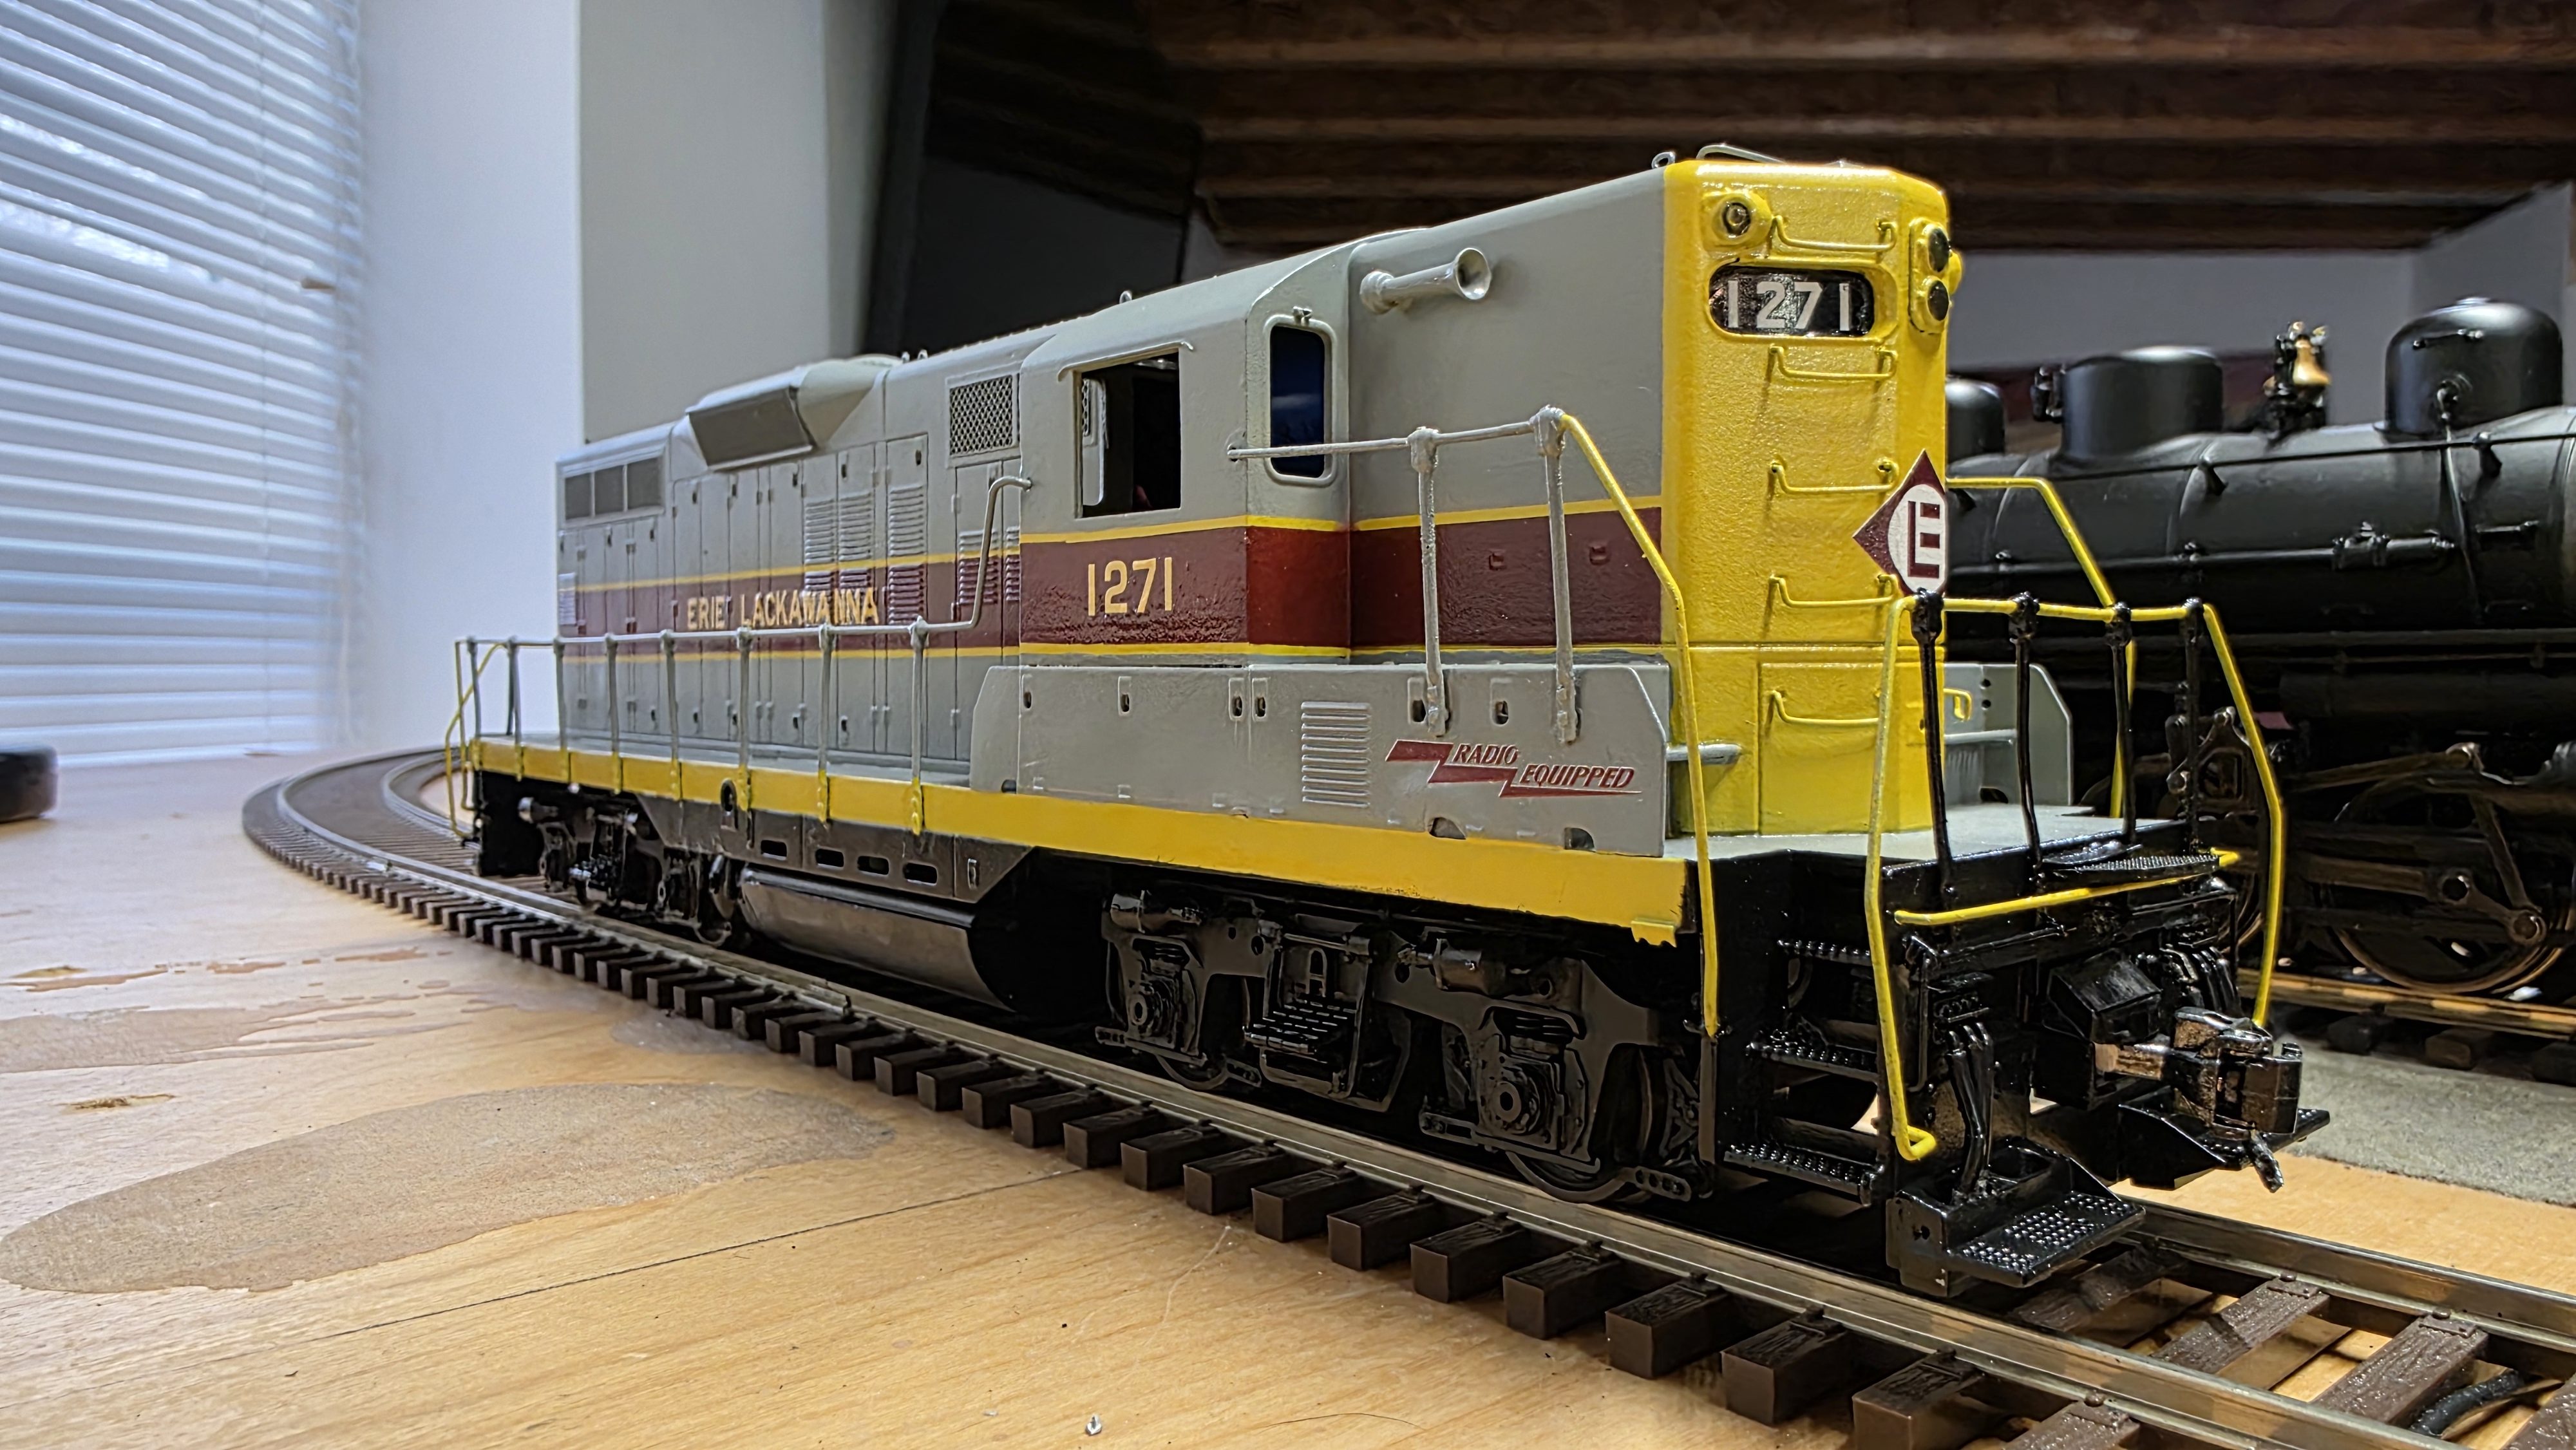
The Erie Lackawanna paint scheme uses three colors: yellow, maroon, and gray. For this poriton, I used TruColor Erie Lackawanna colors. I first airbrushed yellow to the ends and centerline of hood. I find yellow pigment is rather difficult to work with; 60/40 pigment/thinner is too thick, while 50/50 runs too much. I opted for multiple thin coats. Then I masked the ends and the thin yellow bands with 1mm tape. I added the gray next, which was easier to work with. I then taped over the gray on the sides and airbrushed the maroon on, which was the easiest to work with, and had a very nice finish to it.


The next step was to apply the lettering. We opted for CMR Erie Lackawanna GP7/GP9 Gray Maroon Decals. As always, apply a gloss coat where the decals were going to be applied and it makes the film vanish! The number boards are clear plastruct with a black painted on the back and a thin resin layer on the front.

The brass handrails were next. Here they are getting painted. This was more complicated than initially thought given the bottoms of the stanchions were yellow like the frame.
The electronics were next. Yes, even an engine this small can be powered by batteries and be self contained! The electronics started with a standard DCC install elements: the lights (2 headlight bulbs, 2 front marker lights, 2 backup light bulbs, and 2 rear marker lights) were installed, a speaker added, and yes, a battery pack. The fun part is how this engine is charged.
Charging battery powered engines can be done a couple of different ways. People often ask about charging through the rails. This can be done, but I don’t recommend it. You do not want to have an interface point between the battery’s electronics and the track, especially if you run on layouts or clubs that use track power like this customer. There is an increased risk of the two systems interacting, which can severely damage both the battery and DCC/Dc electronics. I prefer to set up physical charging jacks that are accessible so you don’t need to take the engine off the rails to charge.


Accessing these ports in ways that preserve the model’s integrity can be challenging. Steam locomotives provide an easy access point: the water hatch. Diesels can be more difficult. Some have dynamic brake radiators that are removable, some have space on the fuel tank, and some you just have to go in through the frame. On a P&D F7 (above), I ended up putting a charging port where the trainline met the frame next to the coupler pocket. It is in the same place as the train line on the prototype.


On the GP9, I cut out a hole in the front of the engine where the trainline is mounted. The plate has the same plug as the charger and fits right into the hole, making it look like its part of the frame. The air hose has brass wire reinforcement which makes it easier to pull. The effect is quite stunning.

The final result would have been Scranton approved. We were very happy with the TruColor paint and finish turned out. There is little to no difference in appearance between the brass detail parts and the plastic shell.